Foundation Flooring

We lay it right the first time, so you can walk on it for a lifetime!

Call for your free estimate! (954) 357-2777

  • Why Us
    • Who We Are
    • Testimonials
    • FAQ’s
    • Charities
    • News/Blog
  • Showroom
  • Products
    • Tile & Mosaic
    • Hardwood
    • Vinyl
    • Carpet
    • Laminate
    • Other Products
  • Services
    • Installation
    • Container Deals
    • Trade Referrals
    • White Glove Delivery Program
    • Shipping
  • Pro’s/Trade
Contact Us

May 19, 2020 by Matt

When thinking about flooring, the biggest factor to consider is the installation. It costs time and money. Because of this, many homeowners understandably consider doing the installation themselves. 

However, there are intricacies to installation that can cost you more time and money, if you’ve done it incorrectly. There are methods only specific to certain flooring types, different tools and materials to be used, and different learning curves for each. 

Let’s look at 3 examples of flooring methods and see which one is best for you.

Ceramic/Porcelain Tile Flooring Installation

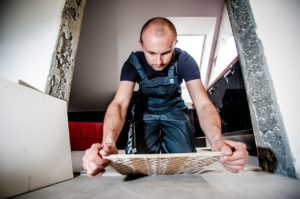
Ceramic and Porcelain tiles are very unique to other types of flooring, especially on installation. While other installation methods can be applied to other flooring materials, the ceramic and porcelain tile installation method cannot be applied to anything else.

For porcelain and ceramic tile floors, we use tile adhesives called thin-sets and mudsets. These are almost made from the same materials but each one is used for different tile sizes.

The thin-set is used on smaller tiles and mudset is used for much larger tiles, typically 32” by 32”, or 36” by 36” and larger. 

Another use-case for mudsets is if you want your floor to be a little bit higher. Using mudsets can make your floor higher by an inch or up to an inch and a half.

Thin-set and mudset installation are the most expensive, the most labor-intensive, and the most difficult to learn.

They need more materials and specific tools that are not that cheap. Another factor that adds to cost, time, and complexity are the requisite of having perfectly level subfloors. In some cases, demolition work is needed to have the right level and type of subfloor.

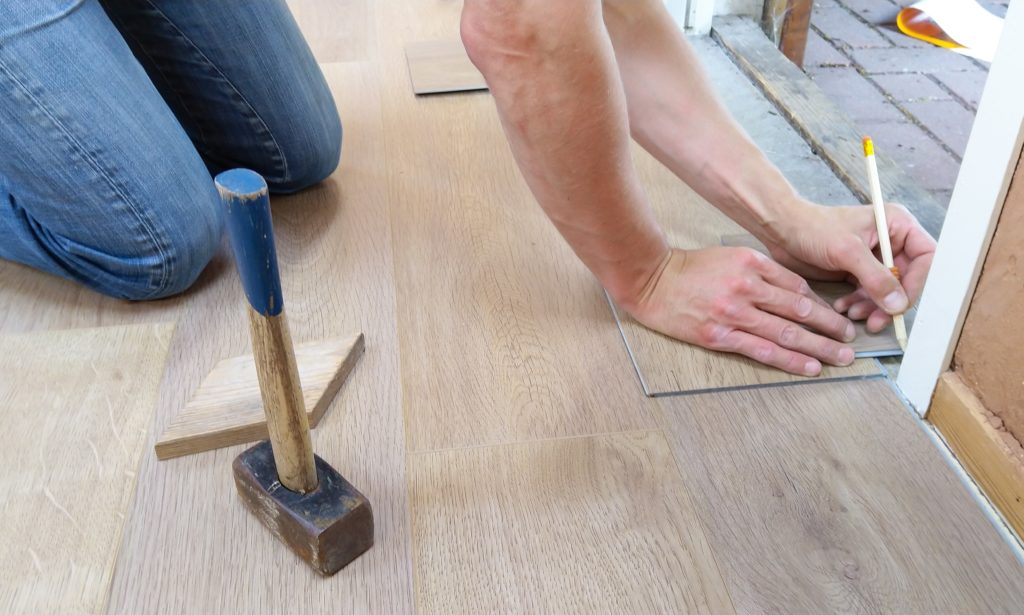
Floating Installation


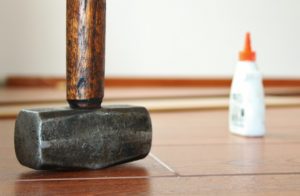
This method of installation is applicable for hardwood, vinyl, and laminate flooring. It’s called the floating method because the materials are essentially floating above the existing floor. It’s not bound by any nails, screws, or adhesives. 

Speaking of adhesives, you also rarely need any adhesive to stick these materials together. They have tongues and grooves that snap when joined together. It’s very easy to do and it gives a sleek, seamless look.

The floating method is the best method if you want to install the floors yourself. It’s also the cheapest.

It requires only a small amount of tools, which may already be in your toolbox, and the materials required to finish installation are among the cheapest there is.

Glue-down Installation

Wood floors can have many installation options. They can be installed floating or they can be glued-down. But gluing down flooring materials isn’t just applicable to make the floor adhere to the ground.

Let’s take cork flooring as an example. It can be used as a soundproofing material. If you have a plywood subfloor upstairs, you can glue down a quarter-inch to a half-inch cork material first. This would give a better sound underfoot and it’s also gonna give a little bit of a softer feel when you walk on it.

Then if you don’t like the look of a cork floor, you can just glue down a wood floor over it, changing the look but retaining the soundproofing qualities and the feel of cork floors.

Glue-down installation is halfway between floating and thin-set/mudset installation both on complexity, time, and cost. It requires the knowledge of the right adhesives for specific materials. 

Moisture content also would be a huge consideration for the flooring materials and the adhesives.


We would always recommend hiring a professional for flooring installation, especially if you could afford it. There are so many benefits:

  • Faster installation from pros who already know what to do
  • Time saved from having to learn the installation method
  • Fewer or zero mistakes that save both time and money
  • You can be more creative with the design as it’s not limited by your skill 

However, we know that not all people have the luxury to afford installation. We hope that this information helps. But if you need more information about the specifics of each method, don’t hesitate to contact us or visit our showroom. Our team will be glad to help you with all your flooring needs!

Filed Under: DIY Flooring, Flooring 101

March 19, 2019 by foundationfloo


Summertime means relaxing by the pool, vacations, and time spent with friends and family. Like most people, chances are that your floors are probably not the first thing on your mind.

However, if you have hardwood floors in your home, it’s important to know that the extreme heat and humidity associated with the summer months can cause your floors to lighten, cup and buckle.

Tip #1: Protect Your Floors from Sunlight

While there is no one “fix-all” solution, there are extra measures you can take to avoid fading or bleaching from overexposure to heat and sunlight.

The best defense against sun damage is to shield your hardwood floors during the hottest hours of the day. To do this, try placing large area rugs near window-facing areas or consider installing new window coverings for additional protection.

If your current window coverings are not giving you enough shade, consider installing new drapes, shutters, shades or blinds.

There are a variety of window treatments on the market specifically designed to protect your home from the harmful UV and infrared lights that cause color deterioration. Once installed, make sure to close your blinds or drapes during the brightest times of the day.

If you have horizontal blinds and don’t want to keep all-natural light out of your home, you can also choose to angle blind slats so that they face upwards. This will allow sunlight to be directed towards the walls and ceiling instead of directly towards your hardwood floors.

Tip #2: Regulate Indoor Humidity Levels

Depending on where you live, summer can bring high humidity levels that can wreak havoc on your hardwood floors.

Because wood is a natural product that responds to humidity by expanding and contracting, it is important to constantly measure the relative humidity levels in your home, especially during the summertime.

A good rule of thumb when dealing with hardwood flooring is to keep the humidity levels in your home anywhere between 35% and 55%.

You can measure the humidity in your home by using a Humidistat or a Hygrometer, an instrument that measures the moisture content in the atmosphere. Once the humidity index exceeds 55%, you risk the possibility for moisture to seep into your floors, causing them to swell and cup.

If you want to prevent humidity from ruining your floors this summer, make sure that your air conditioner is running properly or consider buying a dehumidifier for your home.

Tip #3: Practice Proper Floor Maintenance

Summer typically means more traffic for your floors. Kids are out of school for summer vacation and hosting family gatherings become a common occurrence.

Chances are, you will find yourself cleaning your floors more than you are used to. For this reason, it is important to know the right way to keep your floors healthy and looking great.

We recommend ditching the dust mop and opting for a backpack vacuum cleaner instead. Dust mops and brooms can cause dirt and dust to settle in-between the wooden boards and mopping with water-based products can deteriorate your floor’s wood and finish.

For best results, use a backpack vacuum with a bare floor attachment at least once a week.

Expert Flooring Solutions in South Florida

Caring for hardwood floors can be demanding but by taking proper measurements, you can make ensure that your hardwood floors stay beautiful even during the hot Florida summer months.

Contact the flooring professionals at Foundation Flooring today and discover what our team of experienced and hardworking flooring experts can do for you.

Foundation Flooring can help you pick out the perfect flooring surface for your home or office. We offer a wide variety of custom and brand name flooring at affordable prices that fit your budget. No matter your flooring needs, your Foundation Flooring team is here to help.

Ready to get started? Call Foundation Flooring today at (954) 357-2777 and let us fulfill all your flooring needs.

Filed Under: DIY Flooring, Flooring 101, Flooring Ideas

March 19, 2019 by foundationfloo


Pop colors have seen a resurgence in recent years, and are finding their way deeper into interior design. These colors are a type of vibrant shades that are put on a minimalist or white background to allow them to stand out. When used correctly, pop colors provide a retro look that doesn’t require the entire room to be completely redesigned.

Incorporating Pop Colors in Flooring

Perhaps one of the best places to incorporate these colors is in your flooring. To do this, you must understand the attributes of each color, and when and where each color should be used. Once you have this knowledge you can create dazzling interior designs that will charm everyone who sees them.

Yellow

Yellow has experienced a renaissance within interior design over the last few years. The most popular shade right now is mustard, and when added to your floor yellow provides arguably the boldest and most vibrant statement.

One of the top combinations for flooring is combining yellow with grey, as both colors complement each other. This combination is popular for kitchen floors.

Orange

Orange is a very rich color that is known for its deep tone. However, it can be somewhat restrictive when used in flooring. For instance, orange doesn’t work well with certain woods such as oak or those which are reddish in color, as it will clash with them.

Orange works best when it is combined with cooler shades and designers have found success by adding it to walnut or lime oak.

Teal

Teal is a strong color, so much so that it can completely alter the look of a room. However, it can be subtle, and its pops tend to be dramatic. When teal is combined with lighter shades it will generate a calm feel.

When used with a blue tone teal is perfect for ashen floors, and works well with woods such as Smoked or Limed Oak. However, teal is versatile and can also be combined with darker shades such as Dark Sawn or Ebony, which will give the floor a regal appearance.

Coral

Coral provides a tropical feel and has experienced its own resurgence in 2016. It is the perfect color for contemporary flooring that has an exotic look.

However, because the color consists of orange and red tones it can be challenging to pair with other colors and textures.

Coral works well with dramatic and dark colors, and while it should never be combined with classic oak it works well with woods such as Walnut, Distressed Acacia or Olive Wood. It is best to use Coral once within a space and as a focal point, which is why some interior designers use it on rugs.

Pop colors are here and they will be around for a while. When used properly they can easily lift the vibe in the surroundings, and orange and yellow will be defining colors to watch for this year.

Coral and teal will be used in ways that are rarely seen and will give interior and flooring designers more avenues for exploration.

Filed Under: DIY Flooring, Flooring 101, Flooring Ideas

SAFE PRODUCT CERTIFIED

We Supply Only Safe And Ethically Sourced Flooring

CERTIFIED RESIDENTIAL CONTRACTOR
CRC# 1333643

HOURS

MONDAY - FRIDAY
8:00 AM to 4:00 PM

WEEKENDS & EVENINGS
By Appointment Only

CONTACT

4100 N Powerline Rd Suite B-3
Pompano Beach FL 33073

954-357-2777
email: sales@foundationfloors.com

No Child Labor

No Poisons

No Rainforests

No Deforestation

Terms and conditions | Developed by TinyFrog
Accessibility Feedback
©2023 - All rights reserved